Sunday, December 24, 2006

Body work update


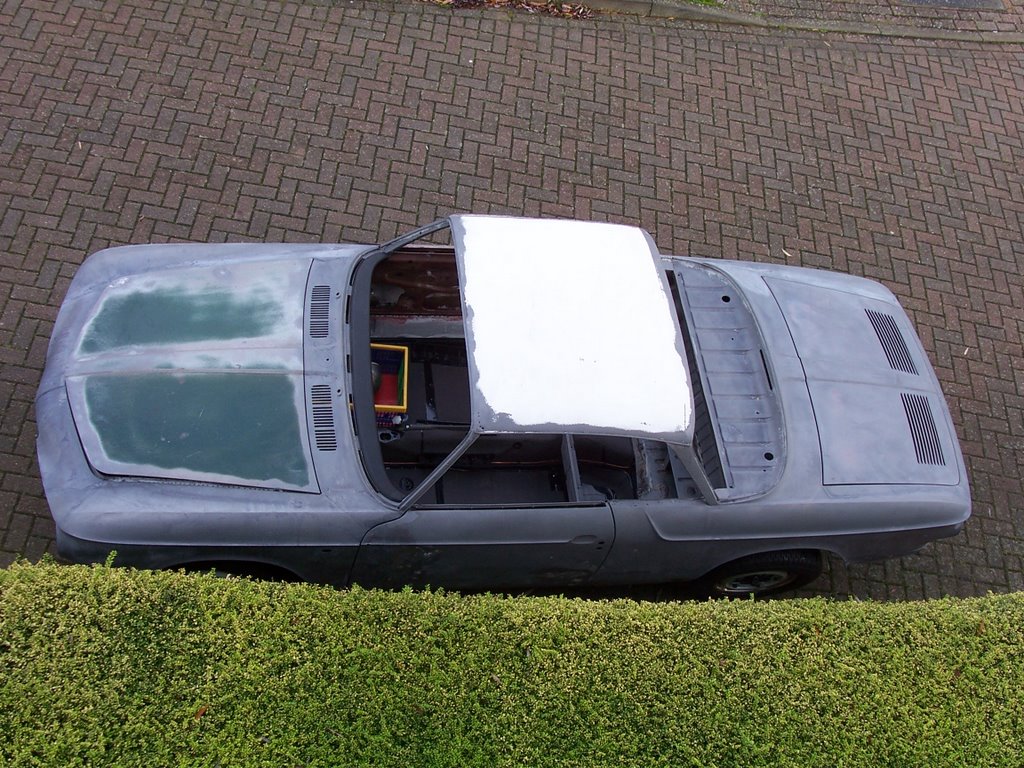
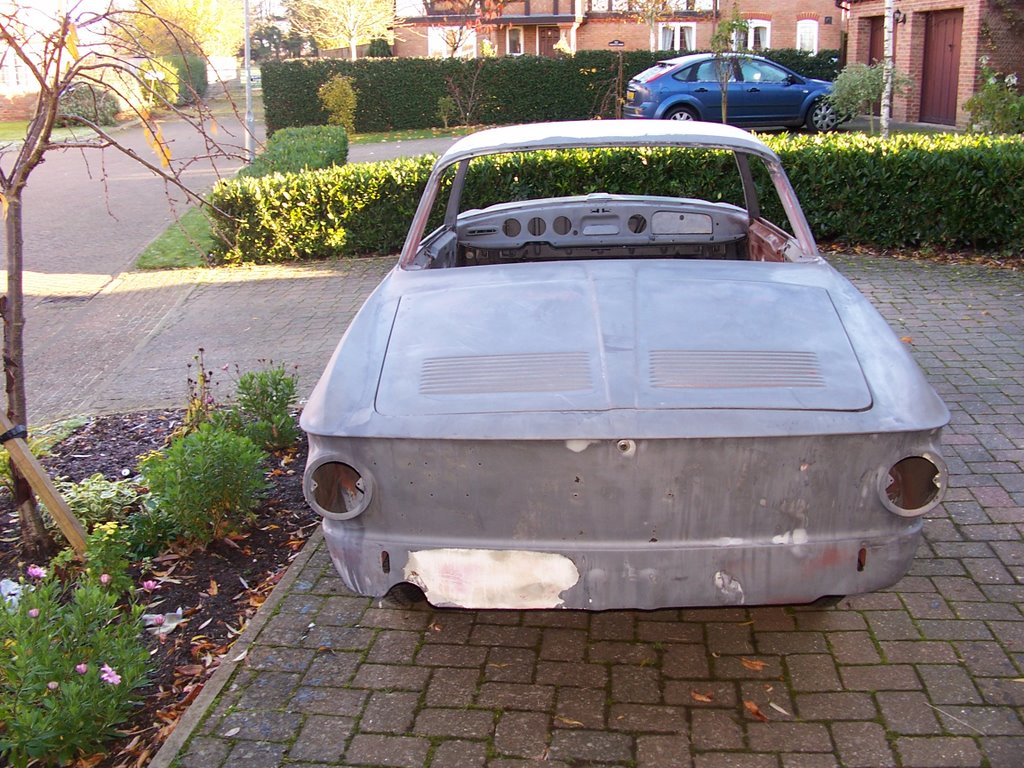
I went over to the bodyshop earlier this week. John has now repaired the rear boot lid that the blaster managed to distort and also repaired the hole in the roof above the drivers side windscreen pillar.

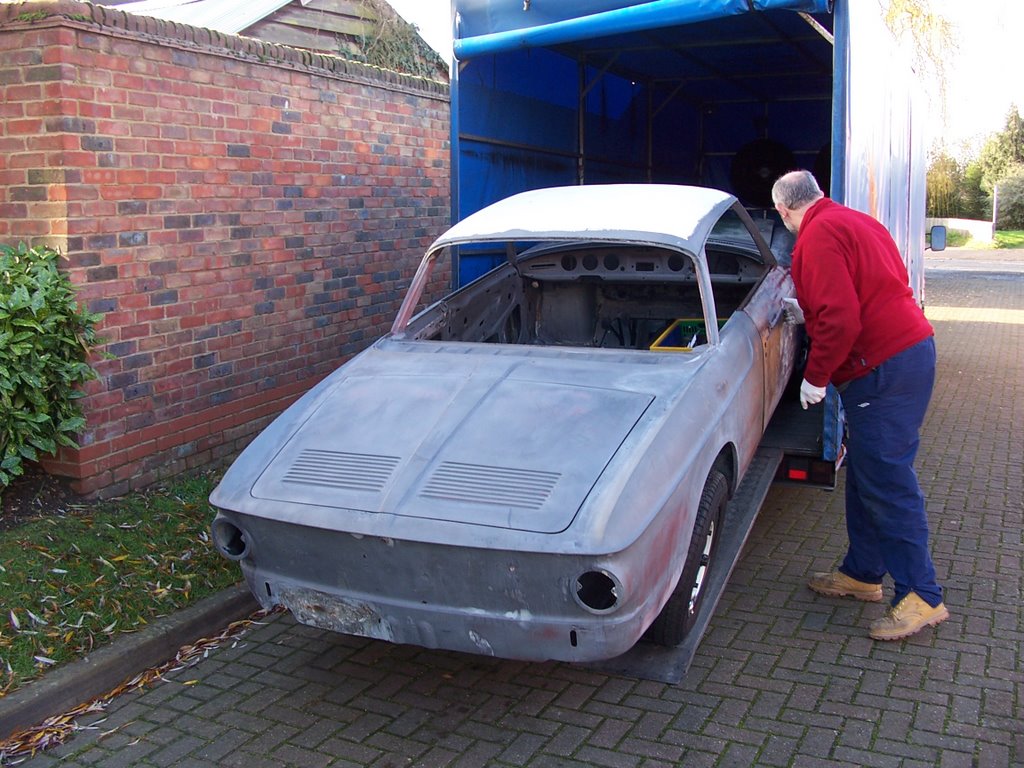
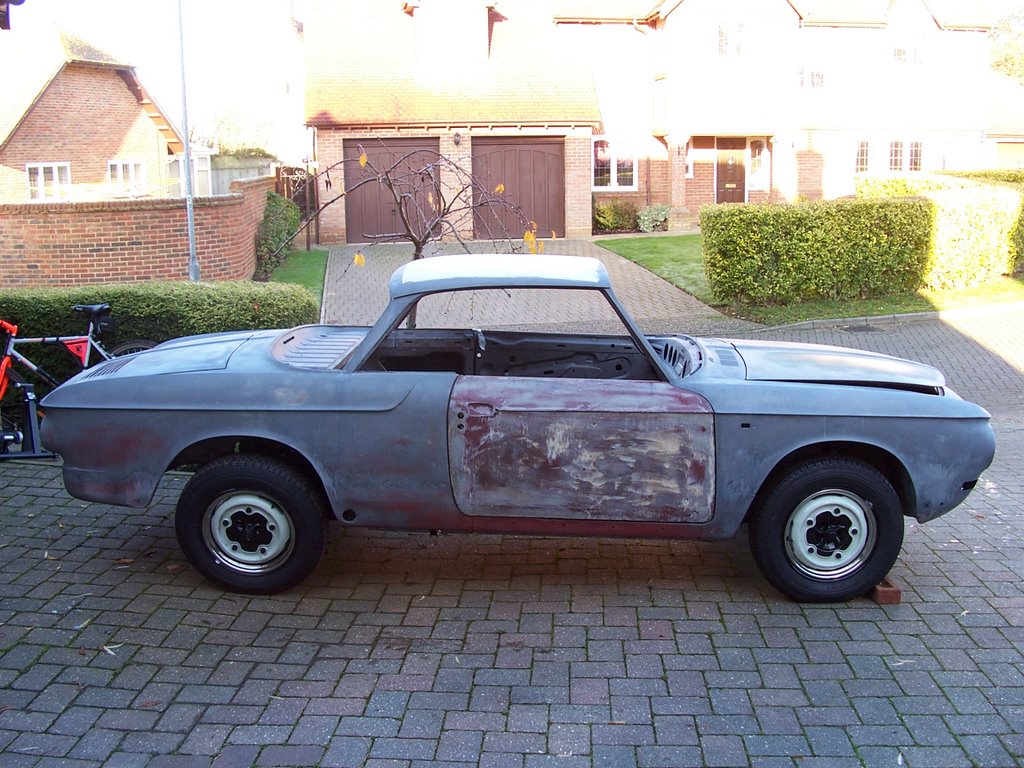
The new door acquired in Germany last year also required a little adapting to give a good fit along with some alterations to the fit of the front wing.

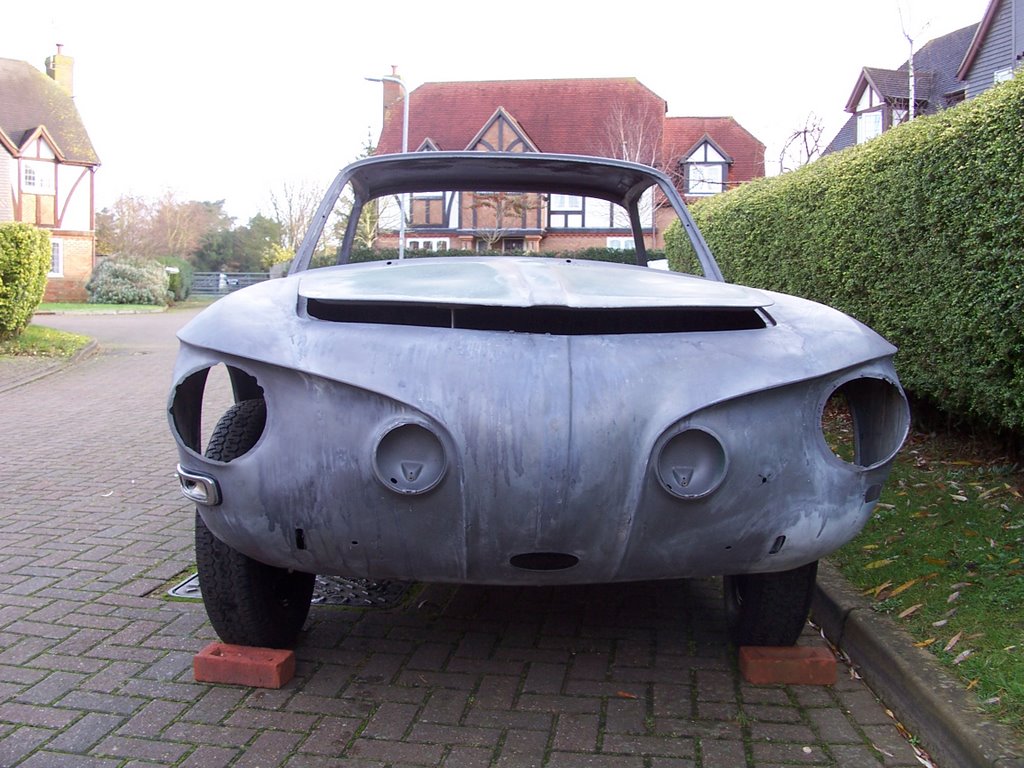
Various minor holes, revealed by the blasting, have been addressed and the headlight bowls have been fitted after some minor adjustments to the wings to ensure a good fit.

It just remains for some areas to be lead loaded and then the car will be ready to bring back home in the next couple of weeks.

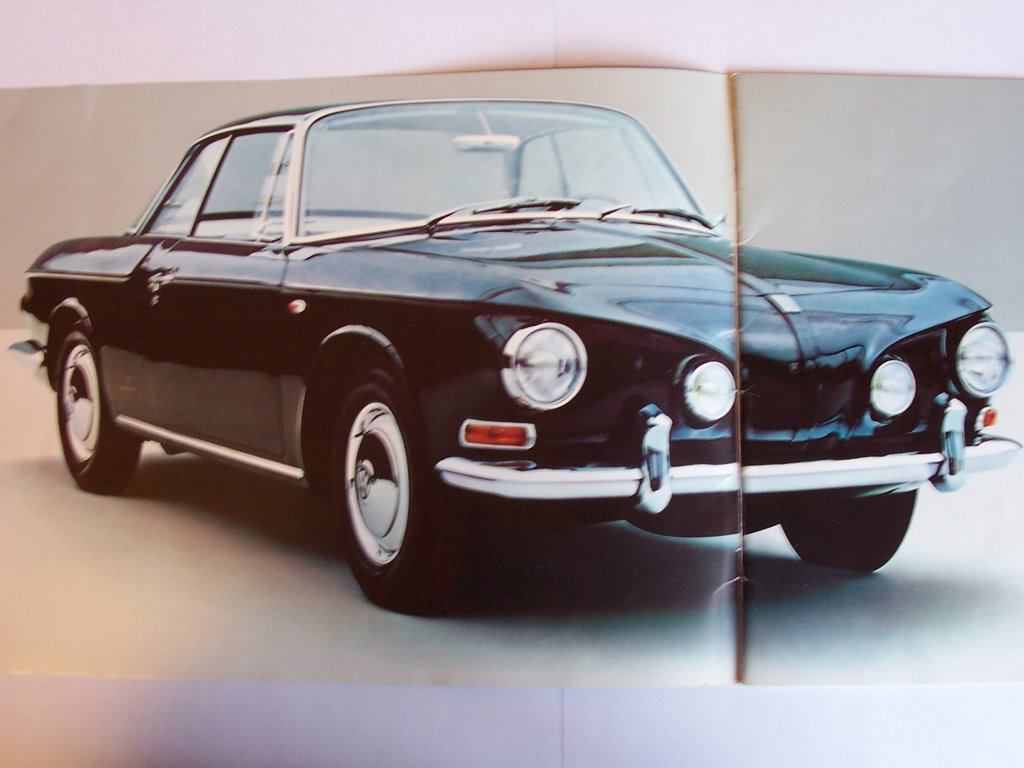
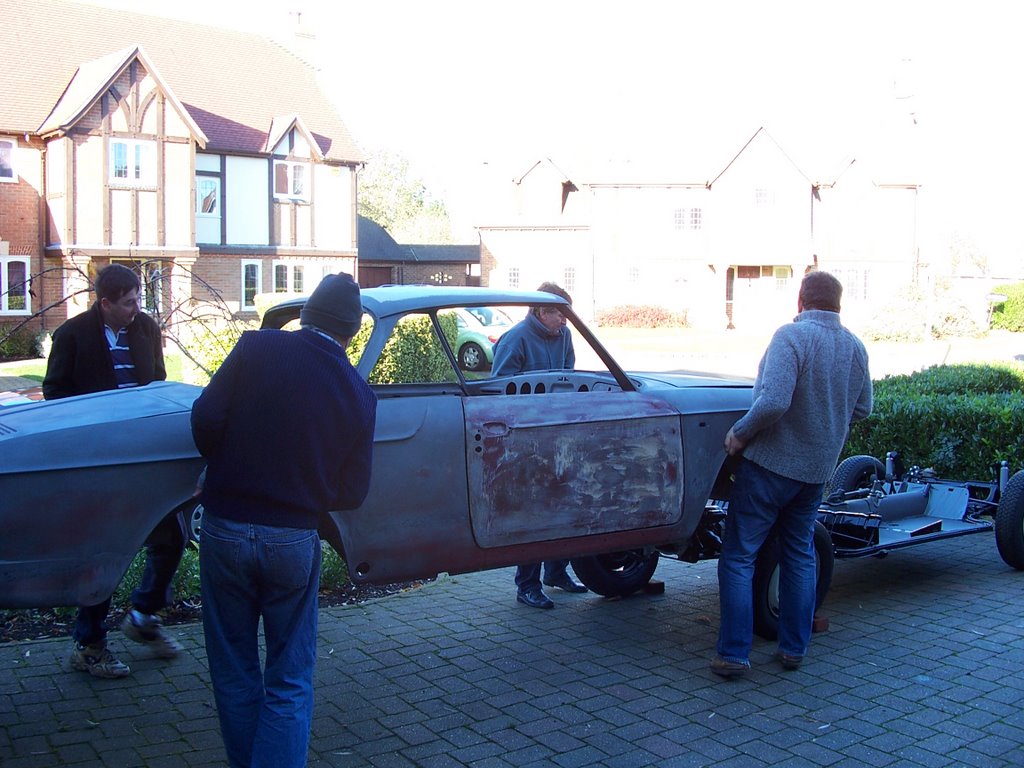
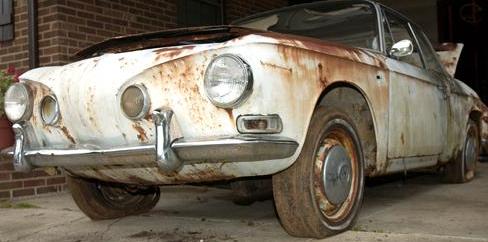
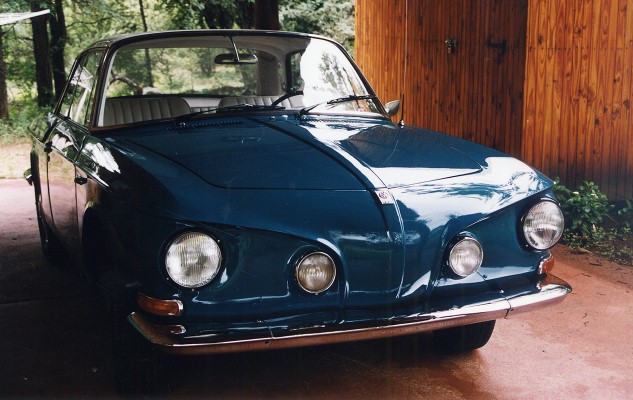
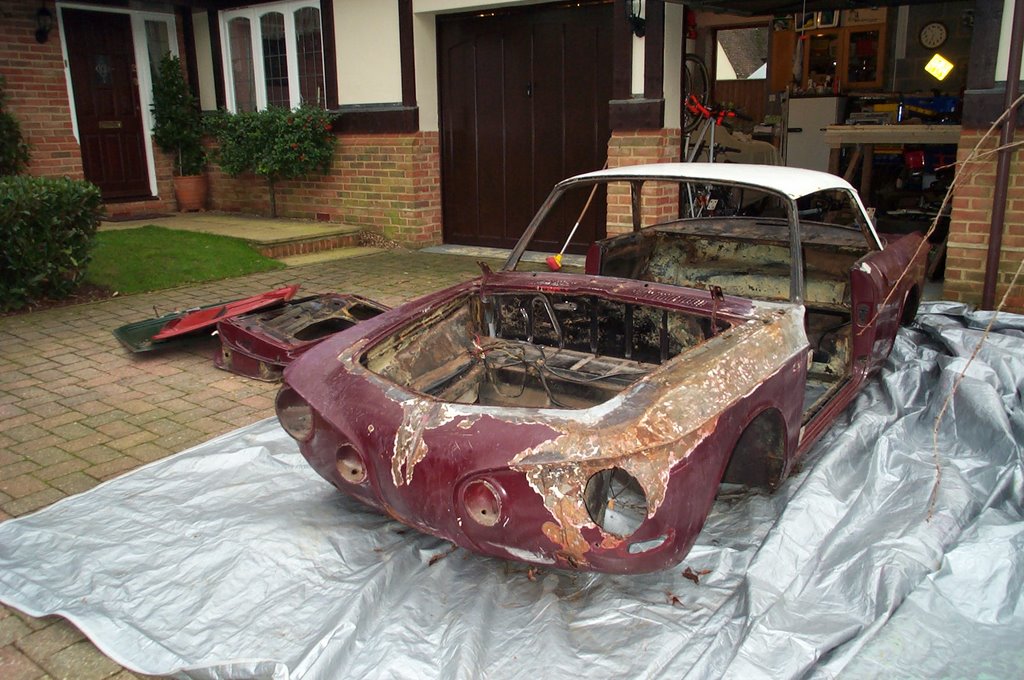
It's come a long way from the state it was in shown in the above photo, I now can't wait to get the paint done and will be firming up my choice of paintshop over the next few months.

Thursday, December 14, 2006

This is what it should look like


Thought I would post a couple of pics of how the car originally looked in solid black and how it will look once it is finally finished back in its original colour scheme.

Having a car that is the same as in a brochure makes it easier to imagine what the finished result will be when it started its restoration so far a way from this.

Wanted - roof gutter trims


I have managed to acquire 5 roof trims lately from Lee Hedges and Sam Manis in the US. Unfortunately my anodiser says he cannot get a good result on any of them due to various dents, twists and deep scratches on individual ones.

Does any one have a really good pair, without dents, bends, twists or really deep scratches that they could sell to me? post me a comment on the site if you do and I will reply.

A few new mechanical pieces sourced


Doug Gray has kindly donated a pair of the oil throwers fitted to the rear drums to my restoration - thanks Doug! Does anyone have any photos of these fitted, with the car away at the body shop I am wondering how they fit in.

Just bought a set of the 62/63 early ball joints with greas nipples from BerT3 for the car. I can't detect any great play in the existing ones, one of which is an original nippled one, and will decide if to replace them all when the car comes back from the bodyshop and I start stripping down the torsion bars, it would probably be daft not to replace them at that stage.

Saturday, December 02, 2006

Work for December


A major activity for December is over as soon as the month has begun. The car has gone off this morning to the body shop to have the remaining bodywork done. This involves fitting of headlight bowls, removal of various dents exposed by the blasting of the body, repair to the body where the blaster got carried away and loads of lead loading and other final adjustments.

Next activity is to sit down and think about what needs doing next as I am beginning to run out of tasks until a repaint can be undertaken. I have in mind a rebuild of the horns and looking into getting some plates with captive bolts made up to enable me to repair the padded top dash which has lost 2 of its mounting bolts through rust.

Work completed in November


November was more eventful than I expected with the body going back on the chassis for the first time in over 2 years; to do this I took the engine out. After speaking to a few friends recently I realised how lucky I was to get this replacement 62 engine. I don't have loads of photos of the internals of my engine from when I restored it but for a great detailed account of the restoration on a 62 engine click on the link to Scott Taylor's blog (VW & VW1500).

I completed the soldering back up of the connections on the steering column unit, nothing worth a photo of and have had new sill treads folded up in aluminium, again not much to see at the moment but I will post a photo when I have finished them and had them anodised.

Thursday, November 23, 2006

Rear vent window latches


I have just received some NOS rear vent window latches from Georg & Petra Magiera in Germany. Excellent & many thanks Georg & Petra.

I wanted to buy them from them at the 50th celebration of the KG last year but had run out of money. These are the early style with smooth knobs, my own were unusable so these are a great aid to the restoration.

Georg & Petra have a whole range of original parts NOS and some used. They sent me a range of photos of the parts in stock and amongst the items I spotted the following for Type 34

Rear inner wing end sections, NOS speedo(small gold 160KMH), NOS speaker grill (Gold),Interior light, side marker lenses (red/white), 1962 White gear knob, 1 front inner wing, 62/63 engine bay metal (body work, not engine tinware), number plate light units/lenses, inner sills and inner sill heater channels, used LHD quarter light frame (can't remember which side)

Contact them on georg.mag@gmx.de Telephone 0 33 95 - 30 04 04

Sunday, November 19, 2006

Touchdown


Well here are the photos of the body finally resting on the floor pan. It is actually sitting about 1 inch too far forward and I will need to chock the wheels and then lift up the front end and push the body backwards to get it right.

The front end is also sitting too high. the only part of the mechanics i haven't replaced is the bearings for the torsion bars. I suspect, despite copious greasing, that something is seized and I will need to strip down the front torsion bars and replace bits in there. More to follow.

Saturday, November 18, 2006

It's the furthest it's moved in 2 years!


Well, I got a call from John at the body shop saying he might be able to take the car back in next weekend and could I put it back on the chassis by then. A quick call to a few friends and we put it back together this morning. No photo of it completely back together yet as technology failed - the batteries ran out! I'll post a pic tomorrow of the complete rolling shell.

Thursday, November 09, 2006

65 under restoration in Kingsport, Tennessee


Here is a pic of a 65 Type 3 ghia being sorted by Sam Manis in Kingsport, Tennessee. Sam is getting all the bits together for it first, no matter what condition and then looking to improve it as he goes along. He has another type 3 Ghia that he is parting out and using the rear clip from to repair some rear end damage.

Looks worse than it is but Sam and dad are in the Body work business so it shouldn't give them too much of a problem. Sam needs parts for his car and has parts from the breaker to sell or swap - drop him a line on slowlow_70bugg@yahoo.com to see how you can help him get this up and running.

Tuesday, November 07, 2006

Badges for the early 62 model


Most of the badges for the car were either missing or in a bad state. Whilst I had some of them from a scrapped car they were not a great deal better.

E-bay turned up the small Karmann script for the rear passenger side wing and also the large style oblong VW 1500 nose badge and a NOS seal. (This seal is now available from PoP in Thailand - see type34.org web site)

The small Ghia shield that goes below the Karmann script on the rear passenger wing was found in Georgsmarienhuette at the 50th year of KG celebrations along with the early style 1500 badge. The 1500 badge fixes on the left hand side of the rear panel underneath the KG script.

When the body was repaired I lost the positioning of the badges on the rear wing and front nose, Scott Taylor, Larry Edson and Lee Hedges across in the US have all provided excellent help and templates on where these should be fixed so that I can get them exactly right - thanks guys.

Friday, October 27, 2006

Work planned for November


During November I hope to be able to complete the restoration of the light and wiper switch unit. So far it has received new button covers, purchased from ISP West, and a number of wires have been replaced. Unfortunately the resistor on the back of the unit has broken off and I will be looking to solder it back on, failing which I will be sourcing a new one from a great site provided by Mike Dempster (or breaking into his garage where I understand from Charlie that he has a NOS one stashed away!)

I will also be looking to make more progress on replacing the door sill aluminium trims. These have suffered from wear over the years and I will be following Paul Colbert's article on the Type34.org website to create some new ones, I aim to do this with a bit of help from the metal folding machine at the engineering workshop a couple of doors round the corner from where I live.

I have also been speaking to John who did the bodywork on the car. we are hopeful that by December it will be back in the work shop for the final pieces, such as fitting the headlight bowls, to be completed. In anticipation of this I have a couple of paint guys coming round to quote on the paint - all donations gratefully accepted!

Water Transfers


The 1962 & 63 model Type 34 Karmann Ghias had a number of transfers on them giving instructions on switch locations, tyre pressures, opening and closing the rear boot lid (all on the glove box lid) and also on the need to keep the rear air intake clear of obstruction (located in the air intake channel).

Whilst some stickers had been reproduced there were no completely authentic water transfers in the exact script and colour or in German.

These have now been reproduced by Scott Taylor (contact him through Type34.org via the website if you need these). They are absolutely fantastic and a great aid to authentic restoration. Scott has also reproduced transfers for the early Knecht style single carb air cleaners and is looking to expand the range to the Mann style air cleaners and later twin carb ones, photos of any good remaining examples should be forwarded to him.

Interestingly my early car doesn't carry these transfers either in the glove box or in the rear air intake tray. I'm not clear if they only came on after the first couple of months production or if my car missed out on them. It will be receiving a set once the paintwork is complete.

Tuesday, October 24, 2006

Work completed in October


Well the brake master cylinder was swapped with no problems and I then pressed on with restoring the indicator housing and arm. Both were stripped of all electrics and bead blasted. The stripped units were then given several coats of paint before re-assembly, including a rebuild of the internal bearing.

Thursday, October 19, 2006

Progress update and parts still needed

Restoration of the car is still going well. I have nearly finished the restoration of the indicator housing and arm. I had it blasted and have now re-sprayed it, just need to rewire it over the next few days. I have also fitted the new brake mastercylinder and with that all mechanical work is now complete.


I still need a couple of parts for the car, these are the correct wheel rim embellishers, as in this photo of Johannes Krasenbrinks car. According to the parts book early ones have a type 2 part number (241601155A) and later ones a type 3 part number (341601155A) they look the same as on the type 1 Ghia like these fitted to Johannes car. Let me know if you have any - NOS preferred.

Also needed is one NOS early pointed style rear drivers side overrider (for LHD car), I have reasonable condition used ones but would like an NOS one.

Saturday, October 07, 2006

KM speedo restoration


The original speedo that came with the car was in a bad state. I have striped it, greased, zeroed and repainted all parts. It was worth saving as it is slightly different from some of the other early speedos I have seen so far.

The paint for the Nov 61 needle (instrument on the left) is acrylic paint by Deco Art and is called Pure Pumkin. You can see from the photo of the July 62 speedo (on the right)that it is a very close match.

Friday, September 29, 2006

A little of the history for my 1962 Type 3 Ghia


My car, chassis number 0002910, was built on November 20 1961, finished in solid black as in the early brochure for the car. It was delivered on November 27 1961 to Skandinavisk Motor Co, Kobenhavn, Denmark.

It was bought on 8 December 1961 by a Mr Helge Storck-Nilsen who immediately exported it to South Africa and registered it there, living in the Claremont area (I think ) of Capetown. He kept it until April 1999.

It passed quickly through another couple of owners (George Platt & Kurt Saunders) before ending up with Justin Gossman in June 2001. By the time I bought it from him in January 2003 Justin had de-registered the car by having it classified as scrap to avoid payment of registration duties etc. I must say it was an accurate description of the vehicle!

Here is a picture of it over in South Africa before I bought it.

A few more accessories


Here are a few more accessories I have accumulated for the car.

Wiring loom


The main and front wiring looms on the car were burnt through in several places and had been poorly adapted and repaired in several places.

I bought a type 3 saloon main NOS loom from a friend in the KGOC(GB) but after comparisson with the original and bearing in mind it was so stiff through age I deceided that fitting it would be a compromise and would prove problematic. It would also still only be a half solution as the front loom was still required.

With the loom out of the car I reconnected everything back to it, noted where wires were missing or had been shortened and recreated the loom back to how it should have been.

I then spoke to Autosparks of Sandiacre, Nottingham, UK who made me a new loom, using the old one as a template within 2 months. It looks fantastic and matches what I provided them.

Thursday, September 28, 2006

A 1962 Type 3 Ghia for sale in South Africa


Tony Smith from Pretoria in South Africa is selling his 1962 Type 3 Ghia. He has fully restored it including a full respray and is looking for 65,000.00 South African Rand. This is roughly £4,500 or US $8,500 if I have got the price and conversion rates right then it looks to be excellent value for such an early car. The photo shows that the headlight trim rings are missing, these European style ones are readily available in reproduction form from Karmann Ghia Ersatzteile service in Germany (great supplier www.karmannghia.de)at 88 euros each. Over riders come up frequently on e-bay as well.

Please check direct with Tony for further details and information at the e-mail address below.

airtestafrica@worldonline.co.za

Wednesday, September 27, 2006

Work planned for October


Next things on my list are the rebuild of the steering column indicator/ignition assembly and swapping the master cylinder I rebuilt for a NOS one.

The steering column was missing an ignition switch when i got it, i have a used one which i temporarily fitted but have now taken out as I want to replace some of the wires to it. At the same time I am going to repaint both the housing and the indicator arm. Its a shame that the indicator arm is deeper on the T3 Ghia than on the T3 saloon as Charlie Harlock had an excellent NOS one I could have used.

I rebuilt the brakes using wheel(slave) cylinders for cars built slightly after mine (about March 62)and rebuilt the original master cylinder with a repair kit. I actually also needed a different master cylinder with a longer stroke to go with the new wheel cylinders and have just bought one from Bert3, safely arrived today, thanks Bert.

Whilst it is the most expensive mechanical part I have had to buy it makes sense to have a car with brakes that work properly!

Tuesday, September 26, 2006

Monday, September 25, 2006

Interior upholstery

The interior of the car was absolutely worn out when I got it, the car had been in South Africa all its life and the hot weather and high mileage took their toll on it.

It had originally been silver beige leatherette with the red/black cloth middle inserts. Some one had covered it bright red plastic in the meantime and there was no choice other than to have new covers made.

i spoke to a few people with early cars in germany and found out that the last of the red black material had gone. Luckily a good friend and great expert on T3 ghias in California, Lee Hedges, had a contact who could remake the covers and the door and rear panels.

All materials are as close as we could get to the silver beige and we have used a brick red leatherette, similar to an option originally avaiable and featured in the 62 brochure for the car. The trimmer even managed to make repro door panels of the right dimensions by adapting a type 2 sliding door panel.

Here are some photos of before and after.

Sunday, September 24, 2006

Recent accessories found


Here are a couple of accessories i found recently for the car.

The coco mats are original ones from the 60s made specifically for a type 3 62 Ghia and still carry the original labels. They are faded where they have been folded and exposed to the sun - i am hoping to dye them back to near the original colour - any helpful tips gratefully accepted.

The Hella switch goes in-line between the speed and speedo cable. It activates the reversing light when you put the car in reverse - simple but effective.

video of our 65 on the motorway

video of our 65 on the M40 taken by Paul  Donovan https://m.youtube.com/watch?v=Y5pXVCcqGfA